

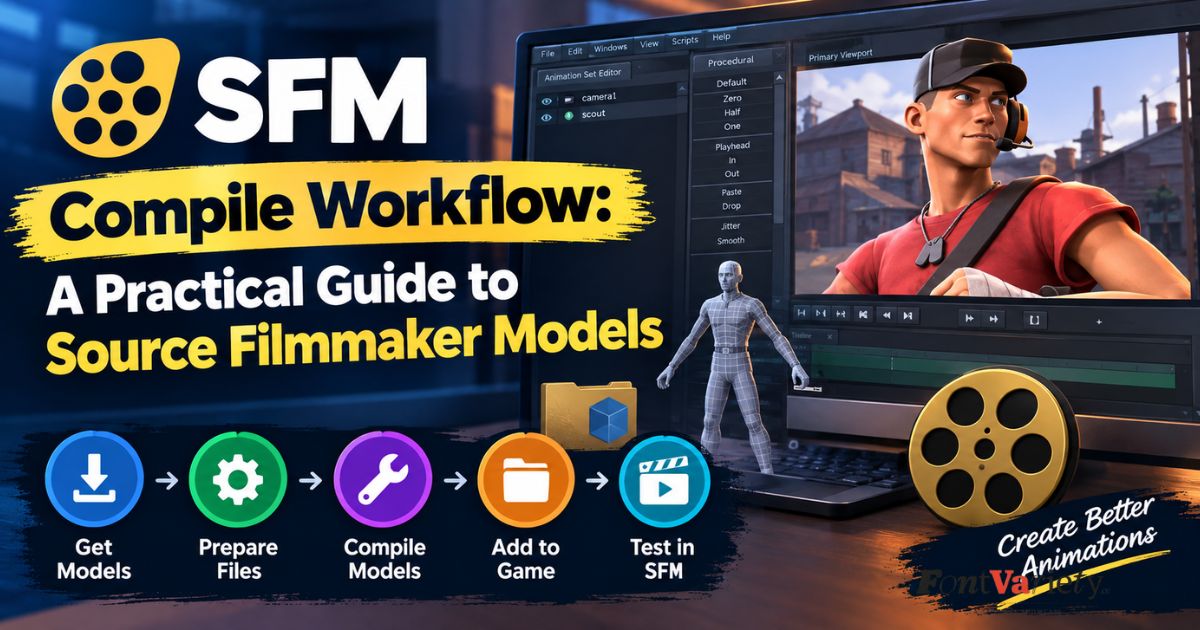
SFM compile is the process that turns your 3D models, textures, and animations into files Source Filmmaker can actually read. Source Filmmaker runs on Valve’s Source engine, so it cannot use raw formats like FBX or OBJ directly. Every custom asset has to pass through a compiler first.
For beginners, this step often feels confusing. Between QC files, VTF textures, and Crowbar settings, one small mistake can stop a model from appearing in the SFM browser. The good news is that the pipeline is logical once you see how each stage connects.
This practical guide walks through the full SFM compile workflow, from file preparation and QC scripting to texture conversion, troubleshooting, and final polish. By the end, you will know how to compile your own models and fix the most common errors.
Understanding the Source Engine Workflow
Source Filmmaker runs on Valve’s Source engine, which cannot read raw 3D files like FBX or OBJ directly. Every model, texture, and animation must be converted into engine-ready formats first. This conversion is the foundation of any SFM compile process.
The workflow moves in one direction: you build a mesh in a 3D program, export it as a Source-friendly format, and compile it into a game asset. Each stage depends on the one before it. A mistake early on, such as a badly named bone, tends to cause confusing errors much later.
Once you understand this chain, troubleshooting becomes much easier. Instead of guessing why a model failed, you can trace the problem back to a specific stage. That habit saves hours, especially on larger projects with many props, characters, and materials.
The Role of Crowbar in the Compilation Pipeline
Crowbar is a free tool that wraps Valve’s command-line compiler, studiomdl.exe, in a friendly interface. Without it, you would type long commands into a console and read raw log output. Most SFM creators prefer Crowbar because it makes the compile step quicker and less error-prone.
Besides compiling, Crowbar can decompile existing models, view compiled assets, and pack or unpack game archives. Decompiling is especially useful for learning, since you can inspect how other creators structured their QC files. Always respect the original author’s license before reusing anything.
To use Crowbar correctly, you must point it to the right game setup. For SFM, that means selecting the Source Filmmaker preset and linking the gameinfo.txt file in the usermod folder. If this path is wrong, your compiled model will build but never appear in the SFM model browser.
Preparing Your Files for Export
Preparation starts inside your 3D software, usually Blender with the Blender Source Tools add-on. Before exporting, apply all transforms, check that the scale is correct, and delete unused objects. A clean scene avoids strange rotations and offsets after the compile.
Next, organize your files into a clear folder structure. Keep meshes, reference SMD or DMX files, textures, and QC scripts in separate, consistently named folders. Avoid spaces and special characters in filenames, because the Source compiler handles them poorly and often throws unclear errors.
Finally, export your reference mesh and at least one animation file, even if it is just an idle pose. Source models require a valid sequence to compile successfully. Skipping this step is one of the most common reasons beginners see their first compile fail.
Writing the QC File: The Blueprint of Your Model
The QC file is a plain text script that tells the compiler how to assemble your model. It defines the model name, the mesh files, the material folders, and the animation sequences. Think of it as the blueprint that connects all your separate files.
A basic QC file uses commands like $modelname, $bodygroup, $cdmaterials, and $sequence. The $modelname command sets the output path, while $cdmaterials tells the engine where to look for textures. If either path is wrong, the model will either fail to compile or appear with missing textures.
More advanced QC files add collision models, surface properties, and bone definitions. Keeping your QC well commented makes future edits far simpler. When you revisit an old project months later, clear notes will save you from reverse engineering your own work.
Creating and Converting Textures to VTF
Source uses two texture-related file types: VTF for the image data and VMT for the material settings. Your artwork, usually a PNG or TGA, has to be converted into VTF before the engine can use it. Tools like VTFEdit or VTFCmd handle this conversion.
Texture dimensions should be powers of two, such as 512, 1024, or 2048 pixels. Non-standard sizes can cause conversion errors or blurry results in the engine. Pick a resolution that suits how closely the camera will see the model, since larger textures add memory cost.
After converting, write a VMT file that points to your VTF and sets properties like the shader, normal map, and transparency. Place both files in the folder path your QC references. If the model shows the black-and-purple checkerboard, the material path is almost always the culprit.
Why is SFM Compile So Important?
SFM compile is the step that turns creative work into something Source Filmmaker can actually use. Without it, a beautifully sculpted character remains a useless file on your hard drive. Compilation is the bridge between your modeling software and your animation scene.
It also affects performance and stability. A properly compiled model loads quickly, poses smoothly, and behaves predictably in the timeline. A sloppy compile, on the other hand, can cause crashes, stretched meshes, or broken lighting that ruins an entire shot.
For animators, understanding compilation also means independence. Instead of relying on others to port models, you can bring in your own characters, props, and sets. That freedom is what separates casual users from creators who build unique, original films.
Benefits of SFM Compile
The biggest benefit is creative control. When you compile your own assets, you decide exactly how a model looks, moves, and reacts to light. You are no longer limited to what already exists in the Workshop or community libraries.
Compiling also brings optimization. You can reduce polygon counts, combine materials, and set proper level-of-detail options so scenes run smoothly. This matters when you build large environments with dozens of props and characters at once.
There is also a learning benefit. Working through the pipeline teaches you about rigging, materials, and engine limits, skills that transfer to other game-modding projects. Many creators find that their overall 3D pipeline knowledge improves dramatically after a few successful compiles.
The SFM Compile Workflow
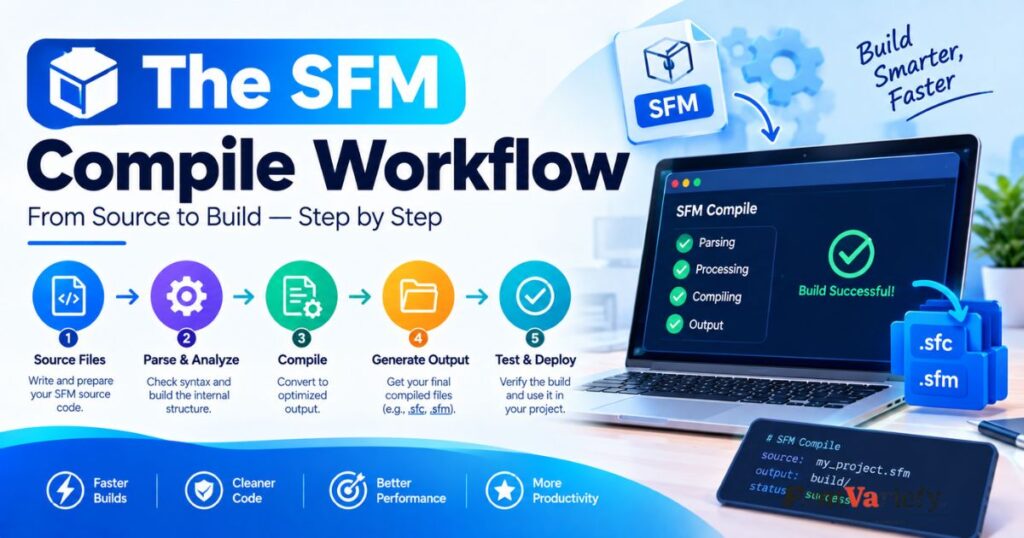
A typical SFM compile workflow begins with modeling and texturing, followed by rigging and export. Next comes the QC file, then the compile itself in Crowbar. Finally, you test the model inside SFM and adjust anything that looks wrong.
Working in short cycles is the key to efficiency. Compile early with a simple version of your model, confirm it loads, and only then add detail. This approach catches structural problems before you invest hours into fine texturing or complex rigging.
Documenting your steps also helps. Keep a checklist for each project that covers naming, paths, materials, and testing. A repeatable workflow reduces mistakes and lets you move faster with every new model you produce.
SFM Compile File Types
An SFM compile involves several file types, each with its own job. Some are files you create and feed into the compiler, while others are outputs the compiler generates. Knowing which is which helps you diagnose missing-file problems quickly.
| File Type | Purpose | Created By |
| .smd / .dmx | Mesh, skeleton, and animation data | 3D software export |
| .qc | Compile script (the blueprint) | You, in a text editor |
| .vtf | Texture image data | VTFEdit / VTFCmd |
| .vmt | Material settings | You, in a text editor |
| .mdl | Main compiled model | Compiler |
| .vvd / .vtx | Vertex and mesh optimization data | Compiler |
| .phy | Physics collision data | Compiler |
If any of the compiler-generated files are missing from your model folder, the model will fail to load properly in SFM. Always check that the complete set appears after a successful compile.
Common SFM Compile Problems and Solutions
Most compile errors fall into a few predictable categories. Missing files, wrong paths, and bone or weight issues account for the majority of failures. The good news is that Crowbar’s log usually points you toward the cause if you read it carefully.
| Problem | Likely Cause | Solution |
| Purple-black checkerboard | Wrong $cdmaterials path or missing VMT | Fix the path and confirm the VTF/VMT location |
| Model won’t compile | No valid $sequence defined | Add an idle sequence to the QC |
| Model not in SFM browser | Wrong output folder or gameinfo setup | Recheck Crowbar’s game and output settings |
| Stretched or deformed mesh | Bad weights or mismatched skeleton | Clean up weight painting and bone names |
When something breaks, change one thing at a time and recompile. Making several edits at once makes it impossible to know which fix worked. Patience and a methodical approach solve nearly every issue.
Essential Software for SFM Compile
A basic toolkit is enough to get started, and most of it is free. Blender is the most popular modeling choice, paired with the Blender Source Tools add-on for exporting SMD and DMX files. Crowbar handles the actual compilation.
| Software | Purpose |
| Blender + Source Tools | Modeling, rigging, and exporting SMD/DMX |
| Crowbar | Compiling, decompiling, and viewing models |
| VTFEdit / VTFCmd | Converting images to VTF |
| Notepad++ or VS Code | Editing QC and VMT files |
| Source Filmmaker | Final testing and animation |
Image editors like GIMP or Photoshop round out the toolkit for texture work. You do not need paid software to build a professional-looking result. What matters is understanding how these tools fit together and keeping their versions consistent across projects.
SFM Compile Process Steps
The process can be broken into clear, repeatable steps. Start by finishing your mesh and rig, then export the reference and animation files. Afterward, prepare textures, write the QC, and run the compile through Crowbar.
| Step | Action |
| 1 | Model, texture, and rig in your 3D software |
| 2 | Export reference and idle animation as SMD/DMX |
| 3 | Convert textures to VTF and write VMT files |
| 4 | Write the QC file with correct paths |
| 5 | Compile with Crowbar and read the log |
| 6 | Load the model in SFM and test |
Following these steps in order prevents wasted effort. Each stage produces a result you can check, so you catch errors before they compound. Skipping ahead usually costs more time than it saves.
Advanced SFM Compile Techniques
Once the basics feel comfortable, you can explore more powerful QC features. Bodygroups let you swap clothing or accessories without separate models, while multiple skins allow quick texture variations. These options make a single asset far more flexible during animation.
Level-of-detail models are another advanced tool. By defining simpler versions of a mesh for distant views, you reduce rendering cost in busy scenes. This is especially useful for crowds, environments, and long shots with many props.
You can also use QC macros and includes to reuse code across multiple models. Sharing common settings keeps large projects consistent and easier to maintain. As your library grows, these techniques save considerable time and prevent copy-paste mistakes.
Also Like To Read This: Crypings Com Guide: How to Check Its Legitimacy and Online Presence
Why Does Source Filmmaker Need Compilation?
Source Filmmaker relies on the Source engine’s own model format, which is optimized for real-time use. Raw mesh files contain far more general information than the engine can handle efficiently. Compilation converts them into a compact, engine-specific structure.
During the process, the compiler also builds data for physics, rendering, and animation. It generates vertex data, collision meshes, and bone hierarchies that the engine reads instantly. Doing this ahead of time keeps SFM responsive while you work.
This design dates back to Source’s origins as a game engine. Assets were compiled once so they could load quickly during gameplay. SFM inherited the same approach, which is why every custom asset still needs to pass through the compiler.
SFM Compile vs SFM Rendering
These two terms are often confused, but they describe very different stages. Compiling prepares assets, while rendering produces the final video or image sequence from your finished scene. One happens before animation, the other after.
| Aspect | SFM Compile | SFM Rendering |
| Purpose | Convert assets into engine formats | Export the finished animation |
| When it happens | Before animating | After animating |
| Tools used | Crowbar, studiomdl | SFM’s export/render settings |
| Output | .mdl, .vtf, .vmt files | Video or image sequence |
Understanding the difference helps you diagnose problems correctly. If a model looks wrong in the viewport, the issue is likely in compilation. If the final movie has flickering or wrong lighting, it is probably a rendering setting.
How the SFM Compile Pipeline Works
The pipeline begins with source files leaving your 3D program and entering the compiler. The compiler reads the QC script, loads the referenced meshes and animations, and validates the skeleton. It then writes the finished model files to the output folder.
Materials are handled separately but tied together through the QC. The compiler does not process textures itself; it simply records where the engine should look for them. At runtime, SFM loads the model and searches the recorded material path.
If every link in this chain matches, the model appears correctly in the SFM browser. If one link breaks, you see symptoms like missing textures or invisible models. Thinking of the pipeline as a chain of dependencies makes debugging far more logical.
Using Crowbar for SFM Compilation
To compile in Crowbar, open the Compile tab and select your QC file. Choose the Source Filmmaker game setup and confirm that the output goes to the usermod folder. Then click Compile and watch the log window for results.
The log is your best friend. Successful compiles end with a clear completion message, while failures list the exact line or file causing trouble. Read from the first error rather than the last, since one early problem often triggers several later ones.
Crowbar also lets you enable options like verbose logging and no-physics compiles. These are handy for testing or narrowing down problems. Once you settle on a working configuration, keep it consistent across projects to avoid surprises.
Why does an SFM render fail or look wrong?
Many rendering problems trace back to asset issues rather than render settings. Missing materials produce the black-and-purple checkerboard, and broken normal maps cause odd shading. These errors originate in the compile stage but only show up at render time.
Other causes include insufficient memory, overly heavy scenes, or mismatched lighting setups. Very high texture resolutions and dense meshes can overwhelm your graphics card during export. Lowering settings temporarily can reveal whether hardware limits are the problem.
To diagnose the issue, first check the model in the viewport. If it looks wrong there, recompile and fix the asset. If it looks right but the render is wrong, adjust lighting, resolution, or sampling settings in the render dialog.
How do you compile custom assets for SFM?
Start by exporting your mesh and animation from Blender as SMD or DMX files. Then convert your textures to VTF, write a VMT for each material, and create a QC file that ties everything together. Finally, run the QC through Crowbar.
After compiling, check that the output files landed in the correct usermod folder. Open SFM, search for your model in the browser, and load it into a scene. Test posing, lighting, and materials to confirm everything works.
If something is off, return to the relevant stage rather than starting over. Most fixes involve small edits to a path, weight, or material setting. Treat each failed compile as a clue that guides you toward a working result.
What are the limits of this guide?
This guide covers the general SFM compile workflow, but it cannot address every model or every edge case. Specific rigs, imported game assets, and unusual shaders may require extra steps. Always consult tool documentation for version-specific details.
Software also changes over time. Blender, Crowbar, and their add-ons receive updates that can shift menu names or export options. If a screen looks different from what is described, check the current documentation for the updated approach.
Finally, remember that Source Filmmaker is an older tool with real technical limits, such as bone counts and texture constraints. Some ambitious models will need simplifying. Community forums and tutorials are valuable companions when you hit problems this guide does not cover.
Troubleshooting Common Compilation Errors
When a compile fails, start with the Crowbar log rather than guessing. Errors like “cannot open file” or “unknown command” usually point straight at a typo or missing file. Fixing the first reported error often clears several later ones automatically.
Watch for path and naming problems. Slashes, capitalization, and stray spaces in QC lines can all break a compile. Use consistent lowercase names and forward or backward slashes uniformly to avoid subtle mismatches that are hard to spot by eye.
If the compile succeeds but the model misbehaves, look at weights, bone names, and scale. Test with a simplified version of the model to isolate the fault. Reintroducing details one at a time makes it clear exactly where things go wrong.
Integrating Models into the SFM Directory
After a successful compile, your model files need to sit in the correct SFM folder structure. Compiled models belong under the usermod models folder, and materials go in the matching materials folder. Keeping this structure tidy makes assets easy to find later.
Restart or reload SFM if your new model does not appear right away. The model browser sometimes needs a refresh to detect fresh files. You can also load the model directly by searching its path in the animation set editor.
Organize your custom content in named subfolders, such as a folder per project or character. This prevents conflicts with other addons and keeps backups simple. A clean directory also makes it easier to share your models with other creators.
The Importance of Skeletal Rigging and Physics
A solid skeleton determines how well your model poses and animates. Clear bone names, sensible hierarchy, and clean weight painting let the model bend naturally. Poor rigging causes stretching, pinching, and unpredictable movement in the timeline.
Physics adds another layer. A collision model, defined in the QC, gives the engine a simplified shape for interactions like ragdoll behavior. Without one, props and characters may fall through surfaces or refuse to respond to physics tools.
Keep in mind that Source has limits on bones and per-vertex weights, so efficiency matters. Only add bones that serve a purpose, and keep the hierarchy organized. A lean, well-planned rig compiles faster and performs better during animation.
Advanced Techniques: Flexes and Facial Animation
Flexes are the vertex-level deformations that drive facial expressions in Source models. Creators build them as shape keys in Blender and export them through DMX files. The QC then maps these shapes to flex controllers that SFM can animate.
Setting up flexes takes patience. You need consistent topology, correctly named shapes, and well-defined controllers for things like brow movement and mouth shapes. Many creators start with a small set of expressions and expand gradually.
The payoff is expressive, believable characters. Lip-sync, eye movement, and emotion all depend on a well-built flex setup. Although it adds complexity to the compile, good facial animation dramatically raises the quality of finished films.
Iterative Testing and Final Polish
Testing should happen continuously, not just at the end. Compile after each major change and load the model in SFM. Try several poses, lighting setups, and camera angles so problems reveal themselves early.
Pay attention to details during polish. Check texture seams, shininess, normal maps, and how the model behaves in extreme poses. Small issues that seem minor in a static view can become distracting once the character moves.
Gather feedback from other creators if you can. Fresh eyes often notice deformation or material problems you have grown used to. Combine that feedback with your own testing, and each compile will be a noticeable step closer to a professional result.
Refining Your Workflow for Long-Term Success
Long-term success comes from consistency. Build templates for QC files, folder layouts, and naming conventions so each new project starts on solid ground. Reusable templates remove repetitive work and reduce the chance of avoidable mistakes.
Keep backups and version notes for your projects. Save working QC files and source scenes before major changes so you can roll back if something breaks. A simple version history can rescue days of work.
Finally, keep learning. Follow community tutorials, study decompiled examples where licensing allows, and experiment with new features. Every SFM compile teaches something new, and steady practice turns a confusing pipeline into a smooth, reliable creative process.
Frequently Asked Questions
What does SFM compile mean?
SFM compile means converting your model files, such as SMD or DMX meshes, textures, and QC scripts, into engine-ready formats like MDL, VTF, and VMT. Source Filmmaker can only load assets in these formats. Without compiling, your custom model cannot be used in a scene.
Which software do I need to compile models for SFM?
You need Blender with the Blender Source Tools add-on for modeling and exporting, and Crowbar for compiling. VTFEdit or VTFCmd converts textures to VTF, and a text editor like Notepad++ handles QC and VMT files. Most of these tools are free.
Why does my compiled model show a purple-black checkerboard?
This almost always means the material path is wrong. Check that the $cdmaterials line in your QC file points to the correct folder. Also confirm that your VMT and VTF files are stored in that exact location.
Why is my model not showing up in the SFM model browser?
The most common causes are a wrong output folder or an incorrect gameinfo.txt setting in Crowbar. Make sure the compiled files are saved inside the usermod models folder. If the path is correct, restart SFM to refresh the browser.
Do I need an animation file to compile a model?
Yes. Source models require at least one valid $sequence to compile successfully, even if it is just a simple idle pose. Skipping this step is one of the most common reasons a first compile fails.
What is the difference between SFM compile and SFM rendering?
Compiling prepares your assets before you start animating, while rendering exports the finished animation as a video or image sequence. If a model looks wrong in the viewport, the problem is usually in compilation. If the final movie looks wrong, check your render settings.
Conclusion
SFM compile may look technical at first, but it becomes straightforward once you understand the workflow. Prepare clean files, write an accurate QC script, convert textures correctly, and compile through Crowbar. Each stage builds on the last, so fixing problems early saves a lot of time.
Remember to work in small cycles, test often, and change one thing at a time when troubleshooting. Good rigging, organized folders, and reusable templates will make every new project faster and more reliable.
With practice, compiling stops being a frustrating hurdle and becomes a creative advantage. You will be able to bring your own characters, props, and environments into Source Filmmaker and build truly original animations.